Wednesday, June 15, 2011

Create~

So I have been creative again and it feels good to sit down at the end of a long day and just get lost in art supplies. With this card I am still working with the White Out paper from an old PS Kit. This paper is just fun and funky and screams create with me create with me. I have also been wanting to use these cute paint brushes on a card. These brushes are from the PTI stamp Friendship Jar Fillers. It is a great set that is very versatile and it is just fun to work with. Speaking of fun have I mentioned yet that I broke out my colored pencils that have not seen the light of day in over a year! I have been coloring with my Copics for so long I forgot my roots. LOL Anyway I used my Prisma's and some Gamasol as that is always a fun technique.

I hope you enjoy the card as much as I enjoyed making it.

 A close up of the brushes

And I always like to make the inside pretty too. 

And wala the whole card. 

The good time's is on a piece of chip board with a rub on. The rub on's that came with this White Out paper are by far the best that I have ever used. I have some scrapbook pages to share with you soon where I also used these and you can see the fun bold colors on top of the colored cardstock and it doesn't get lost at all. The rub ons also come off the sheet so easy even though they are a few years old as I am pretty sure that this kit is from 2008.

Don't forget to stop by tomorrow for my BIG announcement! :)

Tuesday, June 14, 2011

Bits and Peices

So if you visit my blog at all you know that I like to work with kits. With these kits I normally start with scrapbook pages and then once I am done making pages I try to use up the rest of the kit by making cards. Well this is one of those cards. Isn't it fun?
When I saw this latest CardMap from the PageMaps Blog I just thought it was so fun and so super cute and wow what a great way to use up those little bits of paper that normally go into the recycle bin.

I am so sorry that this card is turned the wrong way. It is not like that on my computer but is showing up that way in my post. Please humor me and I will see if I can get it replaced soon.

Here is another view. I inked up all of the edges of the bits so that they stood out a little more against the green paper.

Here is the inside...I normally make the inside a little fancier but the pieces were getting really tiny at this point.


Here is a little sneak peek of some more cards from this same paper that I used up over the weekend. I will be sharing these in the near future along with some other super exciting news.


Supplies: Cardstock/Pattern Paper - We R Memory Keepers White Out line, Cocoa Ink (CTMH), Sentiment also from CTMH

Saturday, June 11, 2011

Everyone Loves Something Different

I received a fun paper pack from Erica over at Personal Scrapper for participating in a crop. Double bonus as her crops always motivate me and then I got prizes to boot...jackpot!  I thought the paper was soooo adorable but I was not really sure what in the world I was going to do with it as it was with colors I just never use. When I went to the weekend crop with friends I tossed this in the back thinking it might be fun to use. Well let me tell you it was fun to use! This page was one of my favorites.  It is so playful and fun and it ended up matching my little ones outfit as well. Who would have thunk it?

Here is a close up of a cluster that I did. I also added some buttons to the circles here and there. It was my favorite tech of the weekend. I did that with various things on most of my pages. See yesterdays post and I also did it on my page here

I also did some hand stitching at the bottom of my journal box

Here is the left page

and the right

and the whole page together. Sorry about the lighting.


Supplies: My Minds Eye - Love Me Do line, Waxy Flax (CTMH) Buttons, Yellow Cardstock

Friday, June 10, 2011

BFF's

This is my girl and her BFF forever. They have been friends for a loooong time. They met in the second grade and have had each others back's ever since. They can do nothing for hours on end and have the time of their lives. They also have no problem being silly, making each other laugh, and being there when you need a shoulder. I hope you all have a friend or two like this as well.

This is a page that I finished while I was on a weekend get away. I was super happy with the weekend. I have not done a weekend scrap in so long. I was not sure if I packed enough but one thing for sure I did not want to pack to much. This is what I used to do all the time! This time I just tossed some kits in my travel bin, some embellishments, added some stamps, photo's and basic black ink and off I went. I am going to do it the same way the next time I go in October. This is part of a PS kit that is almost gone and now I even have less of it. You will probably see more of this kit in the near future as a set of cards. that is how I usually finish off my paper. In fact I have been making cards all day. I will try to share those with you this weekend. In the mean time enjoy the show.

I popped up my banner to give the page some texture. I also used my favorite fiskars bracket punch.

Did a little stamping with a journal set from PTI

 
and here you can see these awesome little pebbles I thought they were hard but when I peeled it off the sheet I found that they are flexible. i loved them and wish I had known sooner that they were a little squishy. Since they were blue I added them to all of the blue circles and to the center of the flowers.

Thanks for stopping by and I will see you again soon with some cards :)

Monday, May 23, 2011

Super Cute

We say this a lot at our house as we have a toddler and almost everything she does is super cute. I also say this all time to my older to girls as they really are both super  cute as well. A few months ago I realized I have tons of photos of them but not a ton of them together. Shortly after this we had a few of those for mentioned super cute moments as you will see in a moment.

I recently signed up for Club Got Sketch I love Valerie's classes. They are always amazing and full of details and great ideas. Here is one of the sketches from the week.


Papers used are the Stella and Rose line from my March 2011 Personal Scrapper kit.

Sunday, May 22, 2011

Binky binky...where is my binky.

Hey everyone. Sorry this is a little late. Hopefully it won't disappoint. I was away at a Scrapbook Retreat this weekend which means I scrapbooked a lot and guess what I found there! My MOJO!!! I had so so much fun and I got tons of pages done which means I will be back to blogging on a regular basis. Yay.

Ok so Binky...Over at Scraptivations we have another great challenge. I was really not sure what I was going to do for challenge 5 which was to scrap something inanimate. Now I must say I was like huh...but I went and looked it up and saw that it was just something that doesn't move. Now most of my subjects are kids so you can see the challenge this posed for me.

Once I decided what to scrap I went around the house and collected the binky's and set up a photo shoot.

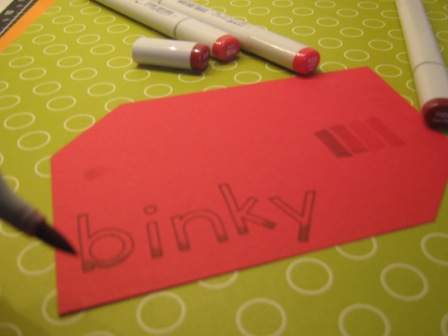
I finally had a chance to try a new technique that I have admired for a while.  Coloring with my copics on color paper. I was doing red letters with an outline alpha from PTI. I matched up the reds and did some shading.

Once I had them shaded the way I wanted I cut them out and layered them.

did a little strip journal and then moved on to paper peicing. Wow so many techniques on this page. I colored her face with my Copics and then stamped her on two sheets of pattern paper.

Here she is ready to assemble

and all together now. When my toddler saw this she said "Maidie" in her cute little voice. Funny thing is she looks just like this little PI girl.

I added some chip board and some other details.

A little more stamping under the embellishments and wala a finished page.


this paper is from an old Stampin' Up! kit that I had. I have been really been trying to use what I have.

Have you ever scrapped an inanimate object? Won't you join us?

Thursday, May 5, 2011

Scraptivations Challenge 4 - Make your own embelishment

For this challenge we got to make our own embellishment. As a stamper this is something that I both love to do and sometimes find hard. I am getting better and better at it all the time and well really anything goes. Right now I have been making lots of flowers for my pages and my cards. I thought I would show you how to do a rolled flower today. You can do this with scissors or if you have a die you can use that. I tried it with scissors last year and it turned out pretty good, I don't have a of my flowers from last year handy but the die is a little faster for me anyway.  I got this set of dies from My Favorite Things.


Lay the die down on the paper that you select and run it through your die cut machine
 

Here is a group of soon to be flowers. I think it is fun to put them on pattern paper as you never quite end up with the same exact flower.

Once you have the cut outs you start at the outside of the flower and roll it tightly until you get to the middle. This can be a little tricky but you will get the hang of it as you do more and more flowers. The middle of the flower actually becomes the base of the flower.

As you can see it gets very tiny from the start to the finish.

Once you are done you can let it loosen up a little bit. I always add some crystal effects to the middle of the flower to hold it together. I set them aside and work on other parts of my project until it is dry.

I also like to add a little pearl or a little bling to the insides of the flowers.

Here you can see a bit of the card along with the adorable little flowers.

A bit more of the card this is a Pure Innocence stamp also from My Favorite Things. I love those little PI girls they remind me of my little girl. I also added a pearl to her shirt.

Here is the finished card. I used the paper from my February scrapbook kit from Personal Scrapper. February's kit featured paper from We R Memory Keepers Be My Valentine cardstock.

Here is another view you can see the pearl on her shirt better.

and the inside of the card. I wanted to keep it simple.

I also like to do Rosette Flowers but you have to use a strong adhesive or they will come apart. You can see an example of those flowers here. Sometimes I like to just fancy cut the pattern paper and add a little extra here and there like I did on this corn here. I also find myself combining several techniques such as the fancy cutting, watercoloring, and stamping like you can see here.

Well I hope you are able to join us the challenge 3 over at Scraptivations. Show us what kind of fun embellishments you like to make!